


I had all the supplies I needed on hand - a roll of grasscloth-look wallpaper I'd picked up at a thrift for $3, a can of wallpaper primer picked up at the Habitat for Humanity ReStore, also around $3, some foamy brushes, painters tape, a sanding block, and a wide plastic scraper.

I've never wallpapered anything before and never used the primer, so I was kind of surprised by its appearance - I don't know why but I expected white. The can said it was fine if it froze and thawed which I thought was a possibility because of where it came from, and the can didn't look to old or anything, so I assume it is supposed to look like this.

I followed the instructions for paneling, since that was as close to the surface I was dealing with as the instructions came. I did a quick sanding with the sanding block, wiped the dust off and taped off the floor with painting tape and a few pieces of copy paper.

The primer went on clear so it was hard to see where I had applied it and where I hadn't, but I could sort of go by feel. While it was drying, I cut my strips of wallpaper to size and after the primer dried the recommended two hours, I soaked the wallpaper strips in the sink for 15 seconds per the directions and then smoothed it on with the plastic scraper. The first piece didn't stick very well (I think I had it rolled too tight when I soaked it and it didn't get wet enough on one end) so I just peeled it back and sprayed it with a spray bottle. The direction said there was no repeat, but the seams are slightly visible. Because of the location they are not obvious, but if I used it on the backs of a bookcase or something I'd want to get it lined up better.
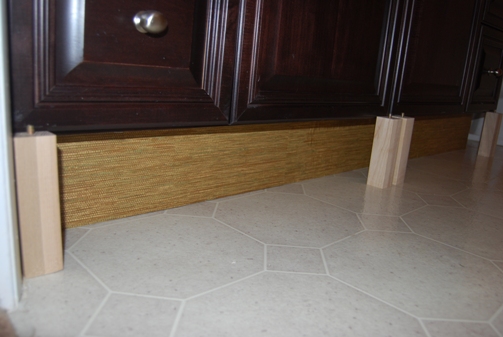
After it dried over night, I cut off the excess along the top with a utility knife, and voila - a much more finished appearance with about 30 minutes worth of work (not counting drying time).


No comments:
Post a Comment