Showing posts with label apartment living. Show all posts

Monday, July 6, 2015

Small Balcony Changes on a Budget

I did a bit of redecorating on my small condo balcony this summer - the pillows I'd used for the last two summers were pretty shot and I needed a comfy chair and some shade out there.


I had this pretty aqua fabric I'd picked up in the remnant bin at Joann's that I used to make my pillows. I didn't bother with zippers or anything fancy this time as I just wanted to get them done.

I also purchased a new chair to replace the sling chair, which was getting pretty rickety. I've always loved chaise lounges, but the space is small and I didn't want to give up that much room. This chair and ottoman set for $99 (check your store, I don't know why the price is double online) from Home Depot seemed to fit the bill - the ottoman slides partly under the chair (or all the way under if you turn it around backwards) to save space when it is not in use.

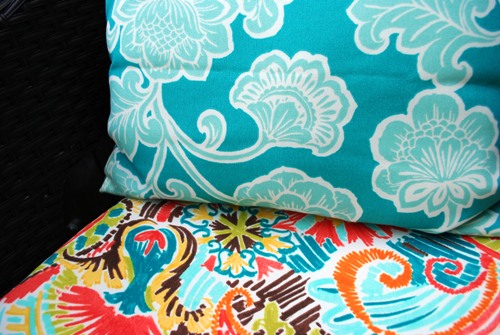
The dark faux wicker is easy care and I thought a nice compliment to the oil rubbed bronze backs and legs on the other chairs. The chair pad ($16ish, sold individually in the store) wasn't intended for this style chair - I thought it fit better when I picked it out, but it isn't too bad - I'll probably just make my own next time. I loved the bright, pretty colors and the aqua tied in nicely with the other pillows. The patterns work together because they share a color and one is busy and crazy while the other is simpler, and calmer. I'm still looking for a new rug in either a small geometric or a stripe - probably in the aqua.

The umbrella is a cute 5' one from World Market. I ordered the frame and cover last year at the end of the season on deep discount. They shipped the frame and then informed me the cover was out of stock - the frame was so cheap ($12ish I think) I went ahead and kept it, thinking maybe I could make my own cover for it or something but when I checked this year they were still carrying them so for $28ish (with shipping) I just ordered again. The base I picked up for $18 at a local Produce Junction. It has plastic parts and doesn't hold together as tight as I'd like, but I guess that is the difference from the ones that cost $50+

You may remember my two tables from years past were navy blue. I spray painted the bamboo-looking one, along with the coral wall pocket, a more traditional gold - the other I was going to spray paint in oil rubbed bronze, but I picked up a cute double-decker plant stand for just $3 at Goodwill to use instead. I love the multiple layers, and while it could use a coat of new paint as well, let's face it, by the time I get to it I'll probably be onto another color scheme, but the color at least works for now. The old table folds so it was easy to store if I want to pull it out again later.


The old globe lights were burned out (I seem to get about 2 years out of them, using them year-round on a timer about 4 hours per night) so I went with rope lights this year. I've found Big Lots to be the best place to get them - they always have long strings (the globe lights were 25', with 40 globes and the rope lights are around 18'), and are inexpensive. They're up to $12 this year, I think I've paid $10 in the past. They're a nice warm light.

My tropical plant (I don't know what it is) is still going strong and I tried growing a zucchini in a pot this year - it is doing well, but I should have given the tomato its own pot. 

Overall we love this small little space - it's great for lounging (all of us), reading, eating, drinking (me), and snoozing (kitties). 


Sunday, July 7, 2013

Balcony Makeover: Phase I

Well, it's been a long, rainy time in coming, but I'm finally about done with the first phase of my mini balcony makeover. I pretty much used what I had on hand, rehabbed my old sling chair, made some pillows with some remnant fabric and an old shower curtain I had laying around, spray painted a few small tables, and tossed down some rugs. My color palette is navy blue, green, and coral with a little orange by way of the pillow fabric and terra cotta flower pots (and a certain orange boy-kitty).


It is a small space and gets direct sun all day, so I mostly use it early in the morning or later in the day. The cats like to hang out and sniff the air and look down on the dogs going for walks around the block and I sit out there to either read or eat breakfast or dinner or enjoy a beer.

One side has two (totally cheap-o) plastic chairs - they were "temporary" chairs I bought last year until I can find something I really love - I think they were less than $5/each. The color works and they're low maintenance but I'm certainly not trying to present them as anything great. I made two pillows with a remnant of Richloom's Little Ash Birds in navy blue on the front and a blue and white striped backing made from a thrifted canvas shower curtain. I'm pretty impressed with myself that I actually put zippers in the covers too! Between the chairs is a thrifted metal patio table I paid $3 for and spray painted navy blue. The flower pots were all ones I had on hand and are planted with coral petunias and the one on the floor has mint, catnip and cat grass in it for the you-know-whos so they don't try to eat the other plants.


And here is what it looked like before:


The other side of the balcony has my sling chair which I repaired by filling in weathered areas with wood filler and painted white. The old cover was shot so I made a new one with the blue and white striped shower curtain and the stripes running horizontally. When I laid it on to figure out the length I liked the way it looked with the extra fabric hanging down, so I just left it. I only had a small bit of the bird fabric left, so I used it as the center panel and patched in some of the striped on the sides so it was wide enough, and it is backed with the stripes too.


The little side table was also a $10 thrift store find I spray painted blue - it looks like bamboo, but was not one of the nice brass ones - it had some sort of antiqued looking silver finish that I didn't feel too bad painting over. The top is mirrored, but since it is outside and I didn't want to accidentally blind myself, a kitty, or random passing pilots, I put some frosted shelf liner on it. It needs spray adhesive or something on the back because it gets moisture underneath but otherwise it's not a bad solution.


And here is the before on this side:


The etage in the background is one I used to have inside and was over, it fits well in the space and seems to be holding up well in the weather. The wall pocket was another thrift find I painted coral and stuck some white petunias in. For rugs, I used two green rugs I got on clearance at Target last year and just randomly layered them (you can see where I shifted them around a but and the color has faded a bit unevenly, but I think it will even out again in the sun).

I still need to finish wrapping the old plastic crates in twine and work on a canopy of some sort. I'll get there. Eventually.


Friday, April 19, 2013

Balcony Planning and Progress

I've finally started working on my outdoor space, which consists of an approx. 6' x 10' balcony and after a night spent perusing Pinterest, I'm pretty excited about it. Some of the examples I really loved included the following:


I think the color palette in this example is just lovely. I will incorporate the orange/coral into my space, but have already picked out fabric in a navyish blue. I also like the natural wicker texture and color and may look to eventually replace my chairs with something similar to these low, comfy looking examples if I can find them. I'm working on an idea for a canopy and like the closed in feel it creates and the overhead lighting - saw a cool pendant light from Ikea that runs on solar and wind power.


I have globe lighting similar to this, and think lighting is a big amenity in any outdoor space. I love and use timers so they just go off and on on a schedule. I also really like the low, comfy looking seating in this space - maybe sometime in the future. Of course I'll be accessorizing with a cat or two.


This is another space I really love- the neutral color palette seems so serene and calm and I love the texture of the wooden crates, which is an element I'm envisioning for my space. I'll definitely be keeping my eyes open for a pair of chairs like these at a thrift too.

I didn't get any true before shots of my space, so let's take a look at the part-way-there pictures. My mini-makeover started with the utility closet door - it had some rusty spots that needed sanding out and the doorknob was antique brass oversprayed with brown - not pretty. Our regulation color is what I like to call "Poo Brown" - when I opened the can it looked more like purple poo, but did dry more on the brown side. Painting is really no fun when you're forced to use a color you hate, but it is what I'm stuck with so will make the best of it. I had a thrifted wall pocket I wanted to use on it - it too was a brown color, which would have been fine on another color door, but obviously wasn't going to work on the brown one, so I picked up a small bottle of coral colored Patio Paint at the craft store - it is like the typical craft paint but said it was OK to use outdoors, so for a few bucks I thought I'd give it a try - spray paint is sometimes tough to find in the exact shade I want and takes up more space in storage too when I just need a little. The pocket still needs a coir liner or some sheet moss so I can plant it - maybe with white petunias or a trailing sweet potato vine (the more of the door I can cover the better).


I'm pretty much trying to work with what I've got, so this side of the balcony also has my baker's rack which is an indoor piece I'm pretty much over, a sling chair that needs some restoration work, and a new $10 thrift store table in a faux bamboo look, which I will most likely paint a navy-ish blue to go with the blue and white striped fabric I want to use on the sling chair. The baker's rack clearly needs to be styled with plants, maybe a colorful plastic tray or plate, a big jug of water (for the plants), lanterns, etc.

For the sling chair I thrifted a blue and white striped canvas shower curtain and will run the stripes horizontally like this example I pinned which seems to be the less traditional way of doing it, since examples were  hard to come by.


The other side of the balcony will pretty much stay as is, except for spray painting the little $3 thrift store table blue to match the bamboo one. The green plastic chairs are about as cheap as they come, but I like the color and they will do until I find something else. 


I want to figure out a way to cover the plastic record crates with wood to look like old weathered crates, something like the below, rope handles and all (from here) which will then serve as small ottomans or additional seating. 


 I also have a few bright green cotton flat weave rugs that I'll toss out there. A few of the examples I pinned had them just randomly layered, which I like.


Monday, November 5, 2012

Terrarium Time


Part of my Hurricane Sandy prep included dragging all the patio stuff into my living room. Yep, there was no food in the house, but my crap wasn't going to blow through anyone's window. When I went to drag it back outside a few days later, I took a look at my sad little succulent plants in their strawberry pot. I'm not "on the succulent bandwagon" so to speak, they're just the only thing I can keep alive because I'm not good at watering anything that doesn't come begging (note: the kitties always have water, one just likes to beg for the faucet to be turned on for him). Anyway, I remembered Katie's Pinterest Challenge terrarium project and the fact that I had purchased a jar to make one some time ago, so I got it out along with some rocks I had on hand (I think they were Dollar Tree vase filler) and went to town.


Rocks on the bottom, plants with whatever dirt they came out of their original pots with arranged in no particular order, more rocks around the edges, cute little clay house I had on hand, water, lid, done.


While this is not exactly a Pinterest Challenge Project (don't have a single terrarium pinned) since it was inspired by someone else's Challenge Project, I'm going to go ahead and link up here and here.

Wednesday, February 22, 2012

Office Planning

My one home improvement goal for 2012 is to do something with my "office." It's currently a huge junk fest/storage space. I certainly can't work in it. I sell on eBay so a lot of what is stored in there is totes full of  inventory and shipping supplies, but there is a lot of other junk I haven't found a place for yet too.


The room doesn't have a closet so storage is on the agenda, and the two pieces of furniture I want to keep are an antique brass twin sized be that I want to use as a daybed and the vanity I've had almost my entire life (both visible in the top photo). Other furniture that's currently in there are a comfy overstuffed chair but it's ratty, a cheap-o bookshelf and a cheap-o dresser, and my "craft cabinet" that is nice and functional to store my sewing and other craft stuff. There's also a mirror attached to the end wall - I don't care if it stays or goes, but I'm a little afraid to try and get it off of there. I thought leaving it there would make the desk area I have planned be able to function as a vanity down the road though.

I've rearranged the room more times than I can count (the pictures above are several arrangements, and I use the term loosely, ago), including emptying everything off the bookshelf and moving computer equipment around. I've made a scale drawing with little to-scale furniture pieces to move around. I tried a 3-D drawing program and I just couldn't come up with a floorplan I liked and could visualize well. I've actually never had so much trouble arranging a room. Ever. There is just too much in there and the room is trying to be too many different things.

Finally I came up with a floor planner at Urban Barn and drew out the room and placed their furniture cutouts in it. It was super easy to use, and thanks to my scale drawing I was able to come up with my measurements pretty quickly and easily. My main hesitation is that I'm afraid that putting the wardrobes on that wall will make the window look off center, and I'm not thrilled about that. Putting them on the wall to the left of the door leaves me with no room for a built-in desk and putting them on either side of the window narrows the room and I really love the daybed tucked into that little nook so I think this is where I want to go with it, but I could always switch them to the window wall if I decide they look better there. Excuse the blurriness of the  image, I could only figure out how to save it as a thumbnail, but I think you get the idea. The blue box on the right is my daybed with a green area rug under it; the small blue box at the bottom is my vanity that I want to use as a sewing station, and the white on the left are two Ikea Pax wardrobes with a custom desk surface in between which would all need to be purchased/built.
.

Here's the same arrangement in 3-D that I did with Google SketchUp which has a slightly steeper learning curve and I'm not sure everything is quite to scale on this one.


Of course I looked to Pinterest for inspiration.


This one (from here) is almost exactly what I'm looking to do. I most likely won't have the middle section shelves (although I do love them) at least right out of the box anyway.


This one (from here) is a dining room, so obviously I would substitute the desk for where the banquet is but I liked the idea of the sconces attached to the sides of the wardrobes (and have a set of them). Ikea also makes wardrobes that come with drawers at the bottom, so I may consider those if the size works out.

This is also a nice example (from here) but the desk area is wider than mine will end up and I will have hanging storage on at least one side of mine. The open storage is nice, but not practical for the junk I need to hide store.


For the daybed side, I just love the idea of it being tucked into a little nook but because of the way it sticks on on one side, I'm not sure I can do the curtained look. It would probably close the room in too much anyway.

From Here

From Here
The vanity needs painting and I'm thinking of going with a fun color like this one from Pottery Barn and I'd like to use it as a sewing table.


So for now this is the direction I'm headed. I only need the time and money to make it happen.


Tuesday, January 31, 2012

The Great Christmas Clean-Up


Hahaha, no I didn't wait until the end of January to take down my Christmas decorations - I'm not one of those people. The stuff came down I think on New Year's day, but I'm just now getting around to blabbing about it (yes, I am one of those people, and since the photos were done, I figured better late then never).

I did a theme tree this year for the first time ever because it just seemed like too much effort to get out every last special, collected ornament that needed to be individually unboxed and unwrapped and then rewrapped and reboxed to put away. I went with plain cheap-o balls from thrift stores and Walmart and some sparkly stuff from the Dollar Tree - all pretty much unbreakable and/or no big deal if it did. Putting it away was super duper easy too. Like items went in zip lock bags, zip lock bags went in small plastic totes, small plastic totes got stacked up on the top shelf of the linen closet.


Oh, and I scribbled on an index card what was in each tote to make pulling stuff out next year easier too. It may not be as cute as having pretty printed boxes or lidded baskets up there, but I like the practicallity of being able to see what's what without having to get everything out next year either.

Tuesday, August 2, 2011

The Pinterest Challenge: Or I Can't Stop Staring at My Shelves


Have you ever finished a project and been so in love with how it turned out that you just couldn't stop running out into the room to look at it?


That's how I feel about my newly fabric backed built-ins which were inspired by these pins I'd saved to Pinterest, and thanks to the Pinterest Challenge: Summer Edition, cooked up by Sherry, Katie, Emily and Lana, I had just the motivation I needed to get this simple project done and crossed off my list.

 
(Source)                                                 (Source)

I'm on a mission to introduce more color into my living room and the natural place to start was the bookshelves, since they're a focal point of the room and the first thing I see when I walk in the front door.


I thought about painting the backs, but the shelves are fixed and I really didn't want to do all that taping and cutting in. I'm lazy that way. Then I remembered some fabric I had purchased for a different project that I changed course on. I do that a lot. Change my mind that is. And buy supplies for projects I never get around to. The fabric miraculously was the perfect aqua blue color to go with the odd greenish chairs I was making over, and the print, a small-scale Moorish tile pattern, blended with the larger scale lattice on the chairs too.


The fabric wasn't wide enough to cut lengthwise and cover both sets of shelves, so it was more economical to turn it width-wise, but I knew that would leave me a little short too. No worries, Jo-Ann still had it in stock so I grabbed another two yards (I wanted some extra for pillows too). I don't know the print name - it is part of their Keepsake Calico collection and found on the back wall along with all the other quilting fabrics and is exclusive to them.

I cut the fabric a little wider than necessary (so I thought, it's pretty close in some places) and there are little gaps behind the shelves and to the sides, so I just fed the fabric down behind and tucked in the sides using a piece of cardboard. This was so much easier than the starching I've seen people do to adhere fabric to walls like wallpaper or cutting individual panels and wrapping it around cardboard or foam core (plus it allowed me to keep the fabric in long lengths in case I ever want to do anything else with it.)


I was going to attach it with white thumbtacks, but the backing was too hard (is this were I add a "that's what she said" joke?), but I had some stick on velcro (also from the same project I'd changed my mind on) so I just stuck pieces of this in the top corners and stuck it right on the wall (side note: if you run out of mustache wax, this stuff will totally work - i.e. don't stick it on your face while you need both hands free to do something else). Because the fabric was a little short I had to pattern match and piece in a little more length. I had a little tutorial and photos planned on how to do this, but the cable for the camera that I took the pictures with is at work, so I'll do a separate post on that next week. I only lined the top five shelves - since the bottom three are pretty well covered with books, I didn't think it was necessary to do them.


So that's it, my easy, peasy project that I should have done a long time ago. So thanks ladies for the little nudge.

I'm also linking this to Thrifty Decor Chick's Before and After Party:


Related Posts Plugin for WordPress, Blogger...