Wednesday, October 26, 2011

Birthday Freebies

I celebrated a birthday recently, and while my family and friends are always good to me, I’m a sucker for freebies too. I recently used this list to sign up for a bunch of free stuff via email.

I joined Sephora’s Beauty Insider Club, which got me an email for a free sample of Philosphy’s Vanilla Birthday Cake shower gel/shampoo/bubble bath combo in special Happy Birthday Beautiful packaging. The sample was a generous 6 oz. size and was easy to claim by presenting the email at the check out and giving them my email address. It has a yummy, decadent vanilla smell.


From Helzberg Diamonds I got a gorgeous fresh water pearl bracelet with a silver? silverplated? heart charm. It is really nice and heavy with individually knotted and well shaped creamy colored pearls and it came in a little red velvet bag. And the sales staff was so sweet - they even offered to find me a husband so they could turn my free pearl bracelet into an engagment ring sale, lol. 


I signed up for Baskin-Robbins’ Birthday Club and they sent a coupon for a free small scoop or a small soft ice cream but when I went to the one in my area I found they had closed so I wasn’t able to cash in. I do have some Burger King coupons for free ice cream and sundaes (these were in my circular inserts I get in the mail, not anything to do with my birthday and I didn’t sign up for them) so I will use one of these to extend my birthday week.

Sunday, October 2, 2011

How to Build a Feral Cat Shelter


October 16 is National Feral Cat Day - a day established by Alley Cat Allies in 2001 to raise awareness about feral cats and promote trap-neuter-return (TNR) programs.

My first real invovement with feral cats occured in 2003 when I was on my way to the Post Office to mail some eBay packages. As I was headed through the parking lot of my apartment complex I spotted a momma kitty with three kittens. She saw me, grabbed one of the kittens and ran. I pulled over and got out, one of the remaining kittens toddled off into a window well and the other ran under a huge forsythia hedge planted on the bank. The little gray kitten in the window well was easy to scoop up and I carried her home and put her in my bathroom before going back to look for the other one under the hedge. When I got back, momma kitty was retreiving him though, so I became mommy just to baby Chloe who was just about 4 or 5 weeks old.


The following year I was able to grab all four of "Turtle's" (momma kitty was a tortoiseshell) babies from the window well right in front of my building and find homes for them. That same year we had another family of slightly older kittens - usually you need to socialize them before about 8 weeks but while feeding them I saw another feeder actually petting one of these older kittens. I called a rescue group and ended up taking this older tamed kitten to them where they found a home for her and they got me started on TNR - the idea behind this is to trap the cats, have them neutered, and return them to their habitat where they can be fed and cared for as outdoor cats. Both Alley Cat Allies and Alley Cat Rescue have a lot of good information on why this is proven to be the best way to deal with feral cats in the community and how to get involved and do it yourself.

I will be doing a later post on the trapping proceedure which I'm about to embark on again but today I want to focus on how to build a simple, inexpensive shelter which is important to help keep the cats dry and warm for the winter.

Supplies You'll need:
  • 18-20 gallon plastic tote ($6-$9) in a color which will blend with the landscape
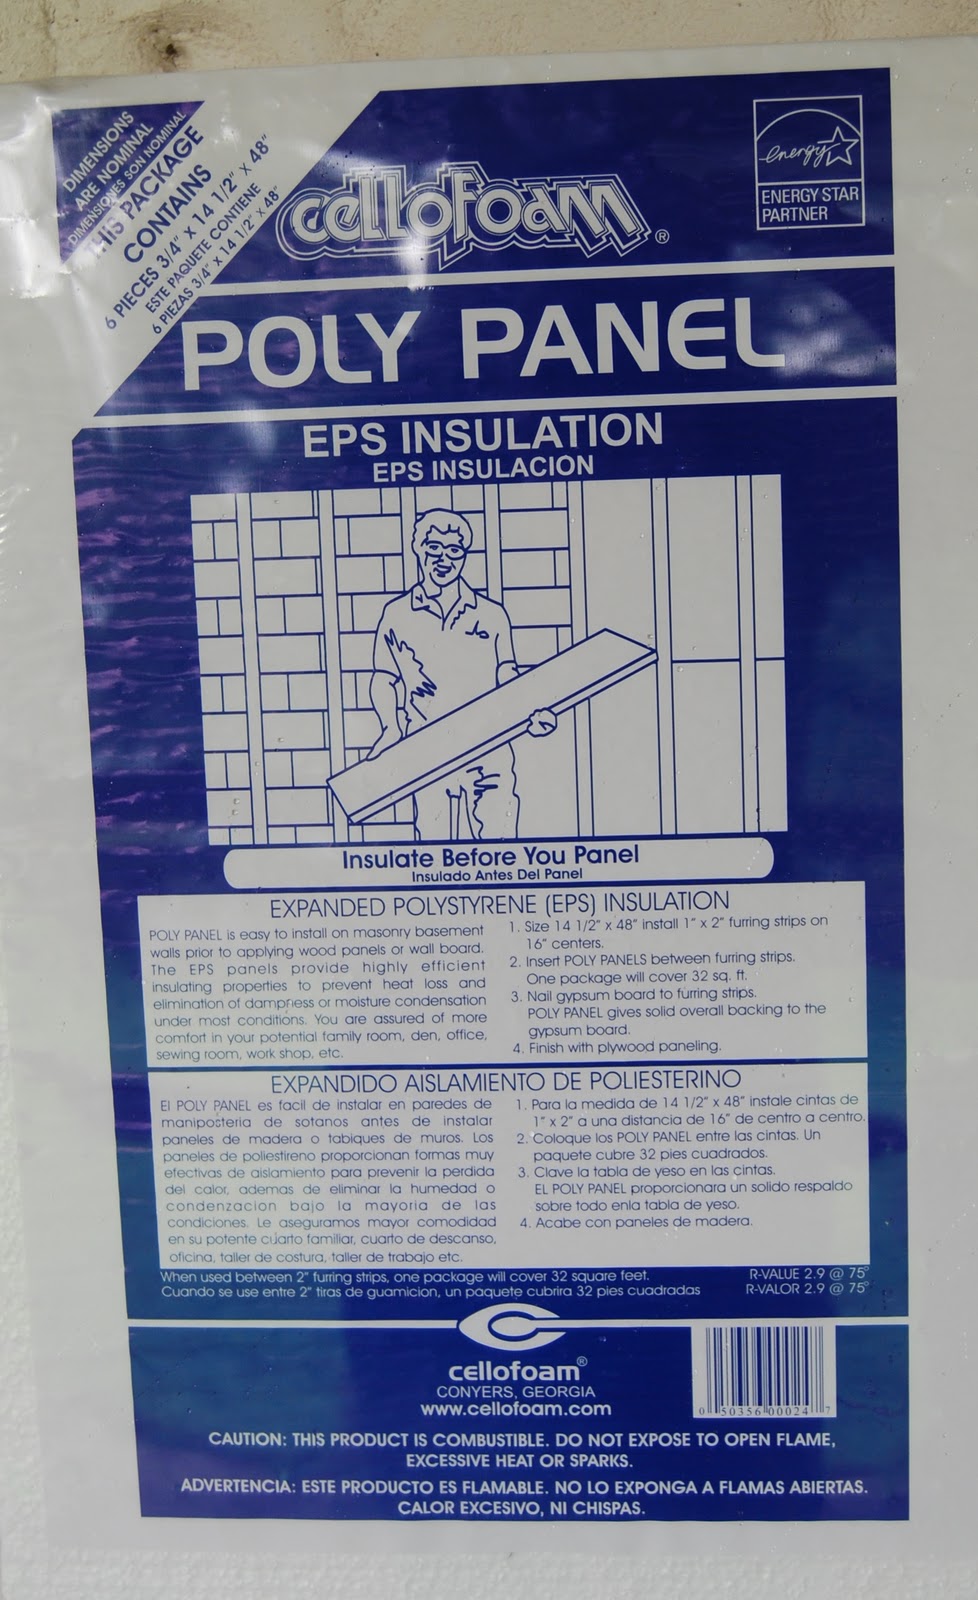
  • Insulating styrofoam ($7.50/6 pack of 3/4" x 14 1/2" x 48" sheets)
  • Duct tape
  • Sharp knife
  • Straw
  • Gloves (optional if you don't want to handle straw with bare hands)


Using the sharp knife, I cut a three sided "door" in an end of the tote. I leave the top intact and fold it up and hold with duct tape to make a small awning to help protect the opening from the rain. Depending on where you'll be placing your shelters, you may want to make a back "escape" door so no one gets trapped - I did this for the ones I put out in the woods because we have a lot of wildlife (racoons, foxes, etc). I do not tape the back door up to help protect the opening from wind and rain, but the cat should be able to push his/her way out of it if needed. A knife with a sharp tip seems to work the best and I just push on it until it plunges in and then saw. My cuts aren't neat or pretty - cats don't care.


The few that I made for the barn forebay just have the one door so we can put bales of straw around them or extra insulation.

Next I cut the styrofoam insulation to fit inside the tote. It is easy to cut just by scoring and snapping it.


I did two layers for the bottom for extra protection from the cold ground. Make holes in the insulation to line up with the doors you've cut in the tote. Line the tote with the styrofoam, taping the walls at the corners as best you can.


Stuff the tote full of straw - straw will not hold water and get soggy like fabric would and even though it might not seem as snuggly, soft and warm as an old towel it is a better choice than something that will get and stay wet and will mold. I also put it in the spaces outside of the styrofoam for extra insulation.


The straw can be changed each year if you can access your shelters, but the ones I did for my last colony got so overgrown I was unable to service them after the first year. Finally add a layer of styrofoam on the top, snap the lid of the tote on and duct tape it shut. Depending on where the shelters are, you may want to use a Sharpie or label maker to label them with something like "Cat Shelters - Do Not Disturb/Remove" so that landscapers or curiosity seekers will leave them alone. Of couse you'll only be placing them off of your own property with permission (*wink*).  I had mine in a right-of-way area behind my old apartment complex and the ones I'm construcing now are at my work, which is a public park so I do label them.

As for placement, try to put them in thick underbrush where they will be hidden from view of the public and near where the cats are fed so they can find and use them. I've even put plates of food right in front of them when they're first put out to help draw their attention. Of course if these are going on your own property, a sheltered porch, tucked in a corner of a fence, behind a shed, etc. are all good choices.


I was able to construct three shelters for about $7.50 each and have one full sheet of my styrofoam insulation left. I've also used styrofoam coolers turned upside down within the tote (leaving the widest part where the cat needs to fit).

Monday, September 12, 2011

The $10 Laundry Room Makeover

You know how you have that mile long list of home projects? And then one day you wake up and do something completely off the map? Just because? That was how I spent Labor Day. I couldn’t stand the mess that is my laundry room One.More.Second.


So I set about cleaning it up. No visions of a complete overhaul or anything, just your basic de-junque-ifying. I pulled out everything in there that didn’t belong. Then I stood looking at the craft cabinet that I’m not in love with and that crowds the washer.


It’s a handy little piece that I rescued from the dumpster many years ago and refreshed with some paint. It’s shallow and holds a lot of my sewing and other craft supplies and it even served as the focal point in my old fireplace-less living room.


But I just haven’t found a place for it since moving. Technically it “fit” perfectly along the back wall of the laundry room, but it just didn’t look good there. I have a cute little étagère shelf – also a dumpster rescue that I redid with paint and that looks a lot like one Ballard Designs used to sell for several hunder dollars.

My cute little shelves were languishing in the closet, holding boxes and boxes of shoes (a noble profession). But I missed them – they used to be in my old, much larger, kitchen and made a nice little display of my milk glass.

So I pulled them out and put them in the laundry room. Oh yes! They are perfect there.


And so it began. As long as I was now “decorating” the laundry room, it was time to do something with the wall above the shelves. The electrical box is a hot mess of old drippy paint and I had purchased a thrift store bulletin board a while back to cover it with. I pulled that apart so I could cover the cork with muslin and paint the frame with oil rubbed bronze spray paint and while I was at it with the paint, I also sprayed two picture frames that could go on that wall and another small bulletin board for a small bedroom project I have in mind (more on that soon). I had been reorganizing some of my Pinterest pins earlier in the weekend and this image from Pottery Barn was kind of stuck in my head for inspiration.


Unlike the gallery wall I did in the living room, I didn’t measure or plan anything with this. The bulletin board obviously needed to go over the electrical panel so that was hung first, and then I just added other elements that I already had on hand by holding them up to get the approximate placement and then just hammering in my nail or hook – I actually have a pretty good eye for this and can usually do even small symmetrical projects without measuring too much – but if patching a wayward hole here and there isn't your thing and you’re more comfortable laying everything out in advance and/or measuring then by all means, do it that way.

I reframed two prints of pictures I had taken in a produce market in Paris in 1996 in the newly painted frames. I considered spraying the mats a brighter white but was too chicken (and it was a drizzly day so I was lucky to get the frames done(ish) before it rained. When I first framed these photos, I had taped strips of grosgrain ribbon inside the opening to give a sort of “double matted” look but I was over that so I pulled the ribbon out and just went with the cleaner original opening.


I moved one platter from the kitchen and added another above it and ran out to purchse wooden “Q” and “C” initials for Quincy and Chloe since this is their “dining room” too. On the shelves I put (bottom shelf) a short squatty jar full of catnip toys (so far no one has tried to help themselves) and a small wooden bench I use to reach stuff above the washer or on the top of the pantry shelves, (middle shelf) a vintage Samsonite train case that is currently empty but I’ll figure out something to store in there, a small candle lantern, and rolls of plain white paper towels (does anyone really buy the country ducks, hearts, and ivy?), and (top shelf) a couple of candle lanterns and a bowl where I plan to pile bills as they come in so I’m not madly searching the house for them when it’s time to pay the piper.


I may add some of my ironstone platters or other things when I get around to de-junque-ifying the kitchen cabinets, but for now, I just want to keep the random miscellaneous clutter off of them and contained behind the curtain that hides the washer and dryer. It took me a while to get this post finished and I have to say I've been pretty good in the past week.

I’d also like to do something about the ugly old light fixture that is in there, but since this was a spontaneous, budget makeover using mostly things I already had, I settled for cleaning off the dripped ceiling paint that came with it and changing the bulb to a normal incandescent (the compact florescent that was in there when I moved in always made the paint color, which is the same as the adjacent kitchen, look a lot more orange and it always bugged me.)


So that is how I spent my Labor Day, on a spontaneous, almost free, laundry room makeover. Briefly interrupted by a quick trip to the pool.


And just a reminder, here is where I started.

And in case you're wondering how I spent my Alexander Hamilton the budget breakdown is as follows:

1 yard unbleached muslin to cover bulletin board - $1.99
"C" and "Q" initials - $2.49/each
4 pack of foamy brushes - .99
3 bottles of craft paint - .59/each
Shelves, spray paint, artwork, accessories  - free/already owned

With tax my total was $10.31 but I still have half the muslin, the foamy brushes and paint left to use for other projects.

I'm linking this to Thrifty Decor Chick's September Before and After Party and Between Naps on the Porch's Metamorphosis Monday.

Thursday, August 4, 2011

The Pinterest Challenge Part Deux: Immortalizing the Furries


Technically the Pinterest Challenge ended on Tuesday, but since the link is still open I thought I'd go ahead and add my second project. I've always loved silhouettes and have been planning to do portraits of the cats for some time now. Before I even knew Pinterest existed, I had saved this image from West Elm to my hard drive


and in my travels around Pinterest I came up with a few more examples I just loved (from here and here).


Silhouette portraits have been around for ages and were popular in American from the 1790s to the 1840s. Traditionally traveling silhouette artists would set up booths at fairs and markets and would cut their subjects out of black paper freehand and mount them on white or cream card stock. It was an inexpensive and quick way to get a likeness for those who did not have the time and money to sit for a formal painted portrait. After the camera was invented silhouette portraits declined in popularity, but the art form has carried into the 21st century and is still a fun way to create a likeness of a loved one and makes for a great graphic when purchased commercially.

For my project I decided to take advantage of all the fun scrap booking papers that are available and selected a patterned background for each cat and a coordinating solid to do the silhouette in - the space I wanted to hang my finished prints is really more suited for 4 frames in the size I had selected, and since I've only had 3 cats in my adult life (Chloe, Quincy, and Mia) I decided to include a kitten silhouette of Chloe (the other two were adopted as adults) and I did this in the reverse of her adult picture - solid back with patterned cut out.

The process was very easy. I chose photos of the cats based on the shape - it doesn't matter what the background looks like, if the lighting is good or bad or any of the other things you normally consider when evaluating photos, just make sure the shape is pleasing and that it will be pleasing in silhouette. Note the Pinterest examples above: you don't need to include the entire pet - the top dog on the left only shows the front 3/4 of the dog and the giraffe on the right is just the head and part of the neck. Make sure the details show, the head is either turned sideways or straight on, limbs either well defined or smoothly tucked under, and look for a photo that highlights your pet's personality or special features (in Quincy's case I had to have a shot of his curly tail). This photo of Chloe would NOT work because her head is turned in and the details of her face would be lost in silhouette - she'd look like a blob with legs and a strange point on her head.


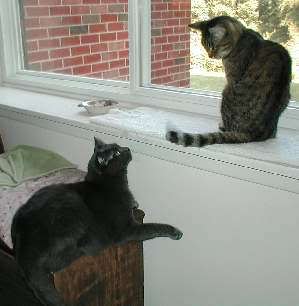
I've known since the day the photo was taken that this picture of Mia (my brown tabby) would be the one I'd someday make into a silhouette. I just loved the arch of her back as she looked down her nose at Chloe and her head was enough in profile that even though her left ear wouldn't show in silhouette, it would just look like her head was turned to a full profile.


I printed the pictures out on standard copy paper (this one I flipped first), cut around the shape to make sure I liked what it looked like and it was the right size and then glued it face down on the back of the scrapbook paper with a glue stick.


Then I just cut around the shape with sharp scissors trying to keep my cuts smooth. When it was done I used the glue stick to glue it to the matted background paper. Remember it doesn't have to be centered - I love the dachshund in my example above and how he was kept low to the ground. Finally I  put everything in (cheap-o Dollar Tree) frames and voila!

Mia Michelle

Quincy Edward
I'm still finishing up Chloe's - it took me awhile to go through and find the photos I wanted of her and now I'm losing light so rather than rush through to get it done, I'll work on finishing them up later. I'll also be printing out four photographs of them that were taken on sheets and other colorful backgrounds so they almost look like photographic versions of the silhouettes and all eight pieces will be hung as a grouping, so look for that, I don't know, sometime or another.
Related Posts Plugin for WordPress, Blogger...