Saturday, March 31, 2012

Fireplace Makeover Phase I and Free Paint for Phase II

Earlier this month I went to change out the arrangement in my fireplace and decided I couldn't stand it one.second.longer. 


It was filthy when I moved in and the cleaner we used totally remove most of the paint on the metal side panels. The doors and rust and the bottom grate had striped paint and rust from where Boy Cat pee'd on it. The faux brick back and floor were cracked and stained. The handles were ugly. While pulling out the fall/winter arrangement a bunch more soot fell down out of the chimney. Just all around yuck. 


I ran right out and got some high heat primer and tapped off the doors and the wall with newspapers and a plastic tarp. I vacuumed out the soot and I sanded down the rusty spots and removed the grates to paint outside.


After getting everything nice and primed, I realized I wasn't going to be able to find the high heat paint in anything but black in local stores, so I ordered the Stove Bright Charcoal from a vendor on Amazon.


Not the cheapest way to get paint, but I had some credits from my Amazon credit card and I really didn't want the flat black. It's a subtle difference and the color is darker then the cap, which I expected from reading some of the reviews. The lighting is making the finished job look a little spotty, but in real life the coverage is nice and even.


I had one small scare when I removed the newspaper from the glass and realized I hadn't taped off the inside of the small side panels. Ooops. But it removed easily with a Mr. Clean Magic Eraser and a little elbow grease.


I still need to paint the hearth, which is Phase II of this project. I've been eyeing up herringbone and chevron patterned marble mosaics on Pinterest

From Here
From Here
but I did not want to deal with all of the cutting that would be involved in this small project, so I decided to try and faux paint it like this example

From Here
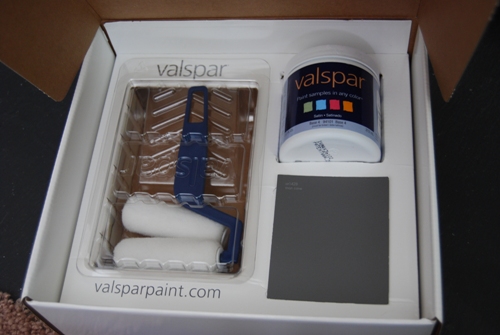
and this is where the free paint comes in. I was able to cash in on Valspar's March free paint sample offer and got an adorable little kit with a sample of Man Cave (a nice, dark charcoal color), a mini paint tray and roller with two covers, a $5 off coupon, a flyer with some of their new color collections and some sample chips of colors they suggest will coordinate with Man Cave - the two tans they suggest are actually very close to my wall color, so I think I'm on the right track.


I'll use my trim color or other miscellaneous white I have around as the base and do the marbling with the Man Cave and another lighter gray and I think hand paint in the grout lines maybe using a mix of the two grays for a medium tone or maybe going lighter. Stay tuned.

I'm linking this to Thrifty Decor Chick's Spring Spray Paint Party. Stop over and see all the great paint projects!

Saturday, March 10, 2012

One Girl, Twelve Cats

In addition to my furry twosome, I find myself part-time caretaker (I split feeding duties with someone else) to a dozen or so feral cats who have taken up residence at my work, which is in a public park. Last year I had our resident five and two traveling males neutered using the principles of TNR (trap, neuter, release) advocated by such feral cat groups as Alley Cat Allies and Alley Cat Rescue. This was done to stem a developing problem before it got out of hand, and low and behold, this year five new refugees arrived out of nowhere – truth be told, I’m happy I can help them. They were emaciated and clearly not just dumped here so I don’t know were they came from or why the moved on from whatever colony they’d been living in. They are somewhat approachable, we can even pet one.


So, with the help of Forgotten Cats, I was once again in the trapping business, and as I mentioned, it is not my first, or even my second time to the rodeo – you can read how I got involved in this in my post onbuilding shelters. The clinic is great to work with: they bring you the traps and show you how to use them if you don’t know, when you have a cat for them they pick it up, and they return the cats when they’re recovered from surgery. For $35 they do all the transport, the surgery and recovery, rabies and FVRCP vaccines, flea treatment and worming using a mostly volunteer staff and the services of three or four vets who also volunteer their time. They’re awesome. This round actually went so fast I couldn't even get pictures (I'm using ones from a few years ago). The cats were in the traps as fast as I put them out, but that is a rarity. It's also helpful if you establish a feeding routine and have some sense of the numbers and appearances of the cats you're after so you know when you have them all - if you don't get them all, you won't break the cycle and you'll just keep having more cats to feed and kittens to home, but you will make a difference in the lives of the cats you do catch, so do the best you can with it.


The first time I did the trapping, at my old apartment complex, it terrified me. It is really easy and very rewarding. There are a few tips, both for your own safety and for the safety of the cats I like to keep in mind:

If  you’re trapping in a public place:

  • Try to keep the traps out of view of the public or stick around to monitor them; you don’t want to leave a defenseless animal trapped and vulnerable to any weirdo who comes along.
  • Pin a note to the traps explaining what you’re doing and provide your cell phone # so if someone is concerned, has questions, or is afraid you’re out to harm or eliminate the cats they can contact you and don’t just release the cats thinking they’re “saving” them. My note says “The XXX Park Cats are on their way to the Clinic for neutering and shots. They will be returned unharmed and healthier.” and then my name and cell #. I enclose it in a zip lock bag and pin it to the trap cover.


For the safety of the cats:

  • If you’re trapping in the cold or damp weather (November in Pennsylvania anyone?) try to keep the traps sheltered from the wind and insulated if possible, and check back often. We have bales of hay in front of our visitor’s center and that is where we were feeding so it was easy to situate a few of them between the bales. I’ve also used loose flakes of hay underneath a trap in other areas. If it is hot and sunny, try to keep them in the shade.
  • Only use paper plates for the food, hard bowls, cat food tins, etc. could hurt the cat if he thrashes around trying to escape. Keep the trap covered as this will keep them calmer.
  • Make sure you have a warm, dry, safe place to keep the cats until you can get them to the clinic or the clinic can come get them. On occasion if I got one later at night, the transport person couldn’t pick up until morning so I laid a heavy duty trash bag and a towel inside by my desk and kept them in overnight. Yes, I know they live outside and it is sometimes cold, but I think it is different being trapped in a trap vs. being able to run around at will. Also, again, you never know who might be nosing around in the middle of the night or what they might do. Keeping them in overnight sometimes meant getting up early to go put them back out before going to my other job (depending on what day of the week it was) so they could be picked up first thing in the morning. My first foray into this where I used a different clinic and had to do the transport (and recovery period) myself, they stayed, in their traps, in my bathroom, sometimes one trap in the tub and one in the small floor area. Feral cats don’t smell good – put their safety and relative comfort first anyway. If you keep them in a garage layer the cement floor up with old towels or blankets for warmth and use something heavier than a sheet to cover the trap. 
  • Layer thick newspaper on the bottom of the trap so there is something to absorb any pee and to protect their feet from the wire of the trap bottom. Use a sheet over the trip plate to help disguise it and put the food as far back in the trap as it will go.
  • If the trap has a “back door” make sure it is latched right so the cat can’t escape. Whoever loans you the traps should be able to show you how to set them and how to secure this back panel and open it in case you get wildlife.

For your own safety:

  • My biggest fear in doing this is trapping wild animals by mistake. I’ve gotten raccoons and possums, never a skunk. The traps we get from Forgotten Cats have back panels that are easy to whip off while you run the other direction. If you can borrow this type they are much better, otherwise you’re stuck having to hold open the snap-down front door of the trap while the animals makes his way out. Possums aren’t that bright and it sometimes takes them awhile to figure out they can go, and raccoons are not always afraid of you. I have a big, long-handled garden fork I use to pry open the door, standing behind the trap while doing so – sometimes a gentle kick to the back of the trap with your foot will get the animal moving out of the trap and away from you. Wear leather work gloves and heavy shoes. I got around the raccoon problem the first time out by setting my traps early in the morning rather than after sundown (this was when trapping where I lived – it was easy to get up at 4 am, put the traps out and then go check them at dawn). Cats are active in the wee hours too – I knew it was time to get up and set the traps when my guys started prowling around looking for breakfast.
  • I never caught a skunk, but was advised to keep a plastic shower curtain on hand to use as protection while releasing the skunk.
  • If you’re checking traps at night in a public place try to take someone with you. If you can’t do this use common sense and stay alert. When trapping at my work, we have a very long driveway so it is easy to see someone coming from a distance or of course to know if anyone is already there in the parking lot (it’s pretty unlikely anyone would walk in, although maybe ax murderers don’t have cars and would). On the one occasion there were people in the lot (we can sometimes be a bit of a “lover’s lane”) I just kept a friend on the phone with me - “if I scream, call the police” – but it was fine. Also remember to bring a flash light.


If you have to do the aftercare, keep the cats inside or if it's not too cold in a garage or a sheltered porch. Keep the trap covered and warm towels under the trap if they're on a cold surface. Provide food and water in paper plates and bowels and do the best you can to slide the wet newspaper out of the trap and a new layer of them in - the cats should move to the back of the trap as you carefully open just enough to get your hand in. I only ever kept the males in over night, and the females I tried to keep for at least 2 days, three if they weren't trying to tear their way out. Forgotten Cats does the aftercare for us, and they kept them about 4 days after the surgeries.


Wednesday, February 22, 2012

Office Planning

My one home improvement goal for 2012 is to do something with my "office." It's currently a huge junk fest/storage space. I certainly can't work in it. I sell on eBay so a lot of what is stored in there is totes full of  inventory and shipping supplies, but there is a lot of other junk I haven't found a place for yet too.


The room doesn't have a closet so storage is on the agenda, and the two pieces of furniture I want to keep are an antique brass twin sized be that I want to use as a daybed and the vanity I've had almost my entire life (both visible in the top photo). Other furniture that's currently in there are a comfy overstuffed chair but it's ratty, a cheap-o bookshelf and a cheap-o dresser, and my "craft cabinet" that is nice and functional to store my sewing and other craft stuff. There's also a mirror attached to the end wall - I don't care if it stays or goes, but I'm a little afraid to try and get it off of there. I thought leaving it there would make the desk area I have planned be able to function as a vanity down the road though.

I've rearranged the room more times than I can count (the pictures above are several arrangements, and I use the term loosely, ago), including emptying everything off the bookshelf and moving computer equipment around. I've made a scale drawing with little to-scale furniture pieces to move around. I tried a 3-D drawing program and I just couldn't come up with a floorplan I liked and could visualize well. I've actually never had so much trouble arranging a room. Ever. There is just too much in there and the room is trying to be too many different things.

Finally I came up with a floor planner at Urban Barn and drew out the room and placed their furniture cutouts in it. It was super easy to use, and thanks to my scale drawing I was able to come up with my measurements pretty quickly and easily. My main hesitation is that I'm afraid that putting the wardrobes on that wall will make the window look off center, and I'm not thrilled about that. Putting them on the wall to the left of the door leaves me with no room for a built-in desk and putting them on either side of the window narrows the room and I really love the daybed tucked into that little nook so I think this is where I want to go with it, but I could always switch them to the window wall if I decide they look better there. Excuse the blurriness of the  image, I could only figure out how to save it as a thumbnail, but I think you get the idea. The blue box on the right is my daybed with a green area rug under it; the small blue box at the bottom is my vanity that I want to use as a sewing station, and the white on the left are two Ikea Pax wardrobes with a custom desk surface in between which would all need to be purchased/built.
.

Here's the same arrangement in 3-D that I did with Google SketchUp which has a slightly steeper learning curve and I'm not sure everything is quite to scale on this one.


Of course I looked to Pinterest for inspiration.


This one (from here) is almost exactly what I'm looking to do. I most likely won't have the middle section shelves (although I do love them) at least right out of the box anyway.


This one (from here) is a dining room, so obviously I would substitute the desk for where the banquet is but I liked the idea of the sconces attached to the sides of the wardrobes (and have a set of them). Ikea also makes wardrobes that come with drawers at the bottom, so I may consider those if the size works out.

This is also a nice example (from here) but the desk area is wider than mine will end up and I will have hanging storage on at least one side of mine. The open storage is nice, but not practical for the junk I need to hide store.


For the daybed side, I just love the idea of it being tucked into a little nook but because of the way it sticks on on one side, I'm not sure I can do the curtained look. It would probably close the room in too much anyway.

From Here

From Here
The vanity needs painting and I'm thinking of going with a fun color like this one from Pottery Barn and I'd like to use it as a sewing table.


So for now this is the direction I'm headed. I only need the time and money to make it happen.


Tuesday, January 31, 2012

The Great Christmas Clean-Up


Hahaha, no I didn't wait until the end of January to take down my Christmas decorations - I'm not one of those people. The stuff came down I think on New Year's day, but I'm just now getting around to blabbing about it (yes, I am one of those people, and since the photos were done, I figured better late then never).

I did a theme tree this year for the first time ever because it just seemed like too much effort to get out every last special, collected ornament that needed to be individually unboxed and unwrapped and then rewrapped and reboxed to put away. I went with plain cheap-o balls from thrift stores and Walmart and some sparkly stuff from the Dollar Tree - all pretty much unbreakable and/or no big deal if it did. Putting it away was super duper easy too. Like items went in zip lock bags, zip lock bags went in small plastic totes, small plastic totes got stacked up on the top shelf of the linen closet.


Oh, and I scribbled on an index card what was in each tote to make pulling stuff out next year easier too. It may not be as cute as having pretty printed boxes or lidded baskets up there, but I like the practicallity of being able to see what's what without having to get everything out next year either.

Related Posts Plugin for WordPress, Blogger...